I bet most people reading this will never have heard of soaking your grains anyway. Apparently many traditional societies worldwide soaked most of their grains, beans, nuts, and some seeds to make them easier to digest and more nutritious by releasing good nutrients. In some books, plain water is enough, while other folks advocate using yogurt, buttermilk, kefir, or water with lemon or vinegar added. These products help to start breaking down the difficult-to-digest products. This makes it easier for you to get the good stuff before it passes through your system. With all of the new fangle food allergies out there I think that this is worth a look. If you would like to read more about this you can check out more information on the Weston A. Price Foundation website.
But there are many people, including "experts" who believe that soaking your grains, etc is unnecessary. The reasons are that a. soaking is not enough to get rid of the bad stuff (the one most often cited is called phytic acid) and that only true fermenting will do this, b. that we get enough nutrients in our diet and so we don't need to free the nutrients from grains (which makes me wonder why we need to eat them if we aren't getting much from them), c. some critics claim that the people who advocate soaking do not have scientific proof of the benefits, and finally d. there are critics who don't say much of anything substantial at all. If you would like to read more about this debate check out NutritionDiva and Kitchen Stewardship to get you started.
I think that with all of these diets the average reader gets bombarded with sciencey sounding words. And if you don't have a very thorough education in this kind of stuff (as I don't), then you can either be won over or left confused (which I am). But if you have more than a passing interest in trying to get the best nutrition into your family you have to make a decision. I don't have too much time on my hands (I am actually typing one handed while trying to calm a fussy baby), and so I will take a leap of faith here. I am trying out a few recipes from the Nourishing Traditions Cookbook. I am not sure what I am looking for in terms of results, but here I go.

Showing posts with label Fermented Foods and Beverages. Show all posts
Showing posts with label Fermented Foods and Beverages. Show all posts
Friday, 15 July 2011

Wednesday, 20 April 2011
Kefir
I have been reading so many good things about drinking kefir that I just had to try it. Kefir is a type of fermented dairy product, much like yogurt, but with many more probiotics. This makes it even healthier for you than your average yogurt. Even folks who have some problems digesting cow's milk (like me) can manage kefir. You can drink it plain, make it into smoothies, or use it in recipes.

Milk kefir grains can be obtained from friends or from the Internet. They look a bit like cauliflower or like tapioca. They are placed in a container of milk and they feed off the milk for the day. They grow and can be used again and again. You can use cow, goats, or sheep milk. Some people also use coconut milk, but this is less successful from what I read, and the grains really need to be fed milk to thrive. I may try to use coconut milk occasionally once my grains have grown a bit more.
I purchased my grains from Kefirshop in the UK for £12. I received a very small plastic pouch of grains with a bit of milk and instructions. I placed them in a jar. Now, this company suggests that you use plastic in case the whole thing explodes. But many websites suggest using a glass jar. To begin with, you need to use only a little milk---200 ml or so until they grow. It is also a good idea to only drink a small amount to get your body used to it. So you will increase your consumption over the weeks and the grains will also be producing more for you.
The most exciting thing for me was to discover that my Other Half loves it. In fact it is exactly like the fermented milk he grew up drinking in Tanzania. The fermented milk there is produced slightly differently in that the traditional way is to place the milk in a gourd which hangs in the kitchen. During the day this gourd is swung about to mix the milk. In the morning it is emptied, sugar added to the milk, and it is often served with maize porridge. The gourd is not washed, so the residue from the previous milk helps to ferment the next day's batch. (This is similar to how yogurt is made).
There is a lot of information about kefir available on the Internet. One useful site is The Healthy Home Economist. This includes a video on how to make it.

Milk kefir grains can be obtained from friends or from the Internet. They look a bit like cauliflower or like tapioca. They are placed in a container of milk and they feed off the milk for the day. They grow and can be used again and again. You can use cow, goats, or sheep milk. Some people also use coconut milk, but this is less successful from what I read, and the grains really need to be fed milk to thrive. I may try to use coconut milk occasionally once my grains have grown a bit more.
I purchased my grains from Kefirshop in the UK for £12. I received a very small plastic pouch of grains with a bit of milk and instructions. I placed them in a jar. Now, this company suggests that you use plastic in case the whole thing explodes. But many websites suggest using a glass jar. To begin with, you need to use only a little milk---200 ml or so until they grow. It is also a good idea to only drink a small amount to get your body used to it. So you will increase your consumption over the weeks and the grains will also be producing more for you.
The most exciting thing for me was to discover that my Other Half loves it. In fact it is exactly like the fermented milk he grew up drinking in Tanzania. The fermented milk there is produced slightly differently in that the traditional way is to place the milk in a gourd which hangs in the kitchen. During the day this gourd is swung about to mix the milk. In the morning it is emptied, sugar added to the milk, and it is often served with maize porridge. The gourd is not washed, so the residue from the previous milk helps to ferment the next day's batch. (This is similar to how yogurt is made).
There is a lot of information about kefir available on the Internet. One useful site is The Healthy Home Economist. This includes a video on how to make it.
Saturday, 26 March 2011
Homemade Ginger Beer
I am a big fan of ginger ale and ginger beer and ginger tea...ginger biscuits..... This version of ginger beer is a bit fizzy because it is lacto-fermented using whey. It is full of natural ingredients and probiotics. It is very easy to make and lasts for a while in the fridge. You can add some homemade natural sugar syrup or stevia if it is not sweet enough to your taste.
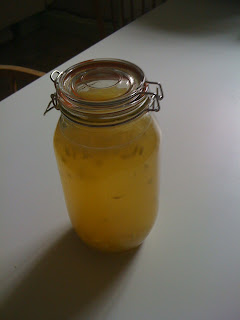
The recipe is from Nourishing Traditions, and I found it on one of my favourite websites, The Nourishing Cook.
You will need:
3/4 cup fresh ginger, peeled and chopped/grated
1/2 cup fresh lime juice
1/4-1/2 cup Rapadura (I used demerara because Rapadura is hard to find here in the UK)
1/4 cup whey
2 teaspoons sea salt
2 quarts filtered water
Mix all of the ingredients together and place in a 2 quart jar, leaving an inch of room at the top. Cover and allow to ferment on your countertop for 2-3 days. Store in the fridge. According to Nourishing Traditions you can add some fizzy water to serve. It is meant to be used slightly warm and consumed in small quantities at a time. It will keep in the fridge for several months.
There are loads of other, very similar recipes available online. There is one on Instructables.com which makes one quart if you feel that you want to make a smaller batch for your first efforts. It uses honey, but needs 3-7 days to ferment. This could produce too much CO2, so might need to be opened every couple of days. And there are several recipes out there which do not require whey, which would be handy if you don't have any on hand.

The recipe is from Nourishing Traditions, and I found it on one of my favourite websites, The Nourishing Cook.
You will need:
3/4 cup fresh ginger, peeled and chopped/grated
1/2 cup fresh lime juice
1/4-1/2 cup Rapadura (I used demerara because Rapadura is hard to find here in the UK)
1/4 cup whey
2 teaspoons sea salt
2 quarts filtered water
Mix all of the ingredients together and place in a 2 quart jar, leaving an inch of room at the top. Cover and allow to ferment on your countertop for 2-3 days. Store in the fridge. According to Nourishing Traditions you can add some fizzy water to serve. It is meant to be used slightly warm and consumed in small quantities at a time. It will keep in the fridge for several months.
There are loads of other, very similar recipes available online. There is one on Instructables.com which makes one quart if you feel that you want to make a smaller batch for your first efforts. It uses honey, but needs 3-7 days to ferment. This could produce too much CO2, so might need to be opened every couple of days. And there are several recipes out there which do not require whey, which would be handy if you don't have any on hand.
Friday, 18 March 2011
Hindu Lemonade

This is my first attempt, so I will have to see if I would like to adjust my proportions over time.
I used the recipe from thehealthyhomeeconomist.com. This is one of my favourite websites and a great resource for information on whole foods and Nourishing Traditions.
You will need:
A 2 quart glass jar
juice from 6-8 fresh lemons and/or limes
1/2 cup whey
1/2 cup sucanat (I used demerara sugar we have here in the UK)
1/2 teaspoon nutmeg
2 quarts filtered water
Combine all of the ingredients in a jar, leaving at least an inch of air at the top (I used slightly less than two quarts of water to achieve this.) Seal with the lid. Place on the countertop for two days. Transfer to the fridge. The lemonade will continue to develop its flavours over time, and can be stored in the fridge for a "while," whatever that means. You can add some homemade natural sugar syrup or stevia (if you like it) for a sweeter taste.
I need to put mine in several containers because I have a typical (read small) European style fridge.
Again, pictures will come later when I have sorted out my phone wire!

Show me the Whey and Homemade Cream Cheese
I just dropped my phone cable in my coffee, so I will be posting photos for this post when I get a new one! (When I exclaimed that my cable was all wet, my 4 year old very helpfully told me, "that's because you put it in the coffee.")
When attempting to create your own lacto-fermented foods, you need to begin with whey. What is whey? You have heard of it, but might not have tasted it. Whey is the liquid leftover when milk is drained to make cheese. In years past, people made their own cheeses and used the whey in their food preparation. With modern conveniences we have left whey behind. That is until recently when body builders have taken to supplementing with whey protein powders. (I cannot recommend them as I am suspicious of dried milk powders and processed foods in general).
In an effort to return to more natural foods I have decided to make some whey, which will feature in a number of upcoming recipes. The recipe makes whey and cream cheese at the same time. The whey can be added to beverages or soups, or used in a number of recipes.
To make whey you really need to have raw milk. It just cannot be done with pasteurised milk from the supermarket. Since my nearest source of raw milk is a two hour drive, I am making my whey with organic yoghurt. This yoghurt has been made with pasteurised milk, but the beneficial bacteria which has been reintroduced will make sufficiently nutritious whey.
This is probably one of the easiest recipes I have ever done. You will need:
Organic yoghurt (large tub)
cheesecloth or a clean tea towel (no bleach or fabric softeners)
strainer/sieve (optional)
bowl
rubber bands or string
two clean storage jars
1. Place the sieve over the bowl and then lay the cloth in the sieve.
2. Pour the yoghurt into the cloth and tie up the corners with string or a rubber band.
3. You could leave this in the strainer, but it is best if you can hang this from a hook or cabinet knob overnight. The whey will drip out. I used 500 g of yoghurt and got one cup of whey and maybe 3/4 cup of cream cheese.
4. You can store the whey in the fridge for up to 6 months. For the cream cheese, you can add salt to taste and store in the fridge for a month. You can add some fruit or herbs to make flavoured cream cheese. This may not last as long, so it is best done as you want it. (Garlic and artichoke is quite nice.) With these small quantities I will be using both the whey and the cheese by the end of the week. The cream cheese has a yoghurty taste, but is very nice.
Whey protein (Wikipedia)
Making Whey from Yoghurt

When attempting to create your own lacto-fermented foods, you need to begin with whey. What is whey? You have heard of it, but might not have tasted it. Whey is the liquid leftover when milk is drained to make cheese. In years past, people made their own cheeses and used the whey in their food preparation. With modern conveniences we have left whey behind. That is until recently when body builders have taken to supplementing with whey protein powders. (I cannot recommend them as I am suspicious of dried milk powders and processed foods in general).
In an effort to return to more natural foods I have decided to make some whey, which will feature in a number of upcoming recipes. The recipe makes whey and cream cheese at the same time. The whey can be added to beverages or soups, or used in a number of recipes.
To make whey you really need to have raw milk. It just cannot be done with pasteurised milk from the supermarket. Since my nearest source of raw milk is a two hour drive, I am making my whey with organic yoghurt. This yoghurt has been made with pasteurised milk, but the beneficial bacteria which has been reintroduced will make sufficiently nutritious whey.
This is probably one of the easiest recipes I have ever done. You will need:
Organic yoghurt (large tub)
cheesecloth or a clean tea towel (no bleach or fabric softeners)
strainer/sieve (optional)
bowl
rubber bands or string
two clean storage jars
1. Place the sieve over the bowl and then lay the cloth in the sieve.
2. Pour the yoghurt into the cloth and tie up the corners with string or a rubber band.
3. You could leave this in the strainer, but it is best if you can hang this from a hook or cabinet knob overnight. The whey will drip out. I used 500 g of yoghurt and got one cup of whey and maybe 3/4 cup of cream cheese.
4. You can store the whey in the fridge for up to 6 months. For the cream cheese, you can add salt to taste and store in the fridge for a month. You can add some fruit or herbs to make flavoured cream cheese. This may not last as long, so it is best done as you want it. (Garlic and artichoke is quite nice.) With these small quantities I will be using both the whey and the cheese by the end of the week. The cream cheese has a yoghurty taste, but is very nice.
Whey protein (Wikipedia)
Making Whey from Yoghurt

Subscribe to:
Posts (Atom)